Compiling KPP
We say we compile a program when we convert all the human-readable code that directly wrote into a binary executable that your machine can actually run directly. In other words, it’s like we’re installing a program into the computer. In this chapter we detail how to successfully download and compile KPP on your system under the Bash environment.
If from now you encounter any bug that isn’t described directly in the text, we refer you to the Possible bug fixes section. If you find a fix for an error that isn’t anywhere in the guide, we also encourage you to contribute to the guide and include that bug fix in that section. (You can check the Introduction section on how to contribute.)
Downloading into your folder
One of the first things to be said is: most of the commands we will use will
only work if you’re in the right directory (which we will always tell what it
is). So when you open a terminal, that terminal is “running” in some directory
in your computer. You can find out which directory that is by entering the
command pwd which stands for “Print Working Directory”. That will show you
exactly where you are on your computer.
Note
You can also use the ls command, which will “list” everything you have on
that directory to get a better sense of where you are. Also, you can use the
command tree -d `pwd`, which shows you your current directory on top, and
the subdirectories in it in a tree-like structure. Try it! This can also be used
to make you get a sense of where you are and what directories are “around you”.
To change directories, you can
use the command cd, which stands for “Change Directory”. So if you want to
go to your downloads directory, you can type cd Downloads, or cd
/home/myuser/Downloads depending on where you are on your terminal (the first
is a relative path (to your current location) and the second is an absolute or
full path; you can read more about relative and absolute paths here).
Note
Throughout this document, we’ll generally use myuser to refer to
your username in the system. This generally comes right after /home/
and you should change according to your case. So if your user name is john
you’d replace /home/myuser with /home/john in every occasion.
If you prefer to download KPP through its website manually and unpack it
somewhere, you’ll have to go there with your terminal. So, if I unpack it in my
home directory, as soon as I open my terminal I’ll have to use cd
/home/myuser/kpp-2.2.3. This command will only work if the path is correct
(it might not work on Windows emulators, for example, which may place the
/home directory elsewhere (you can always just google).
However, if you’re insecure with navigating your directories using your terminal, it’s best to do everything via this second, more straightforward, option. It uses solely commands but it’s easier. First, with the terminal open somewhere (anywhere in this case) run the following commands:
1 2 3 4 | cd $HOME
wget http://people.cs.vt.edu/~asandu/Software/Kpp/Download/kpp-2.2.3_Nov.2012.zip
unzip kpp-2.2.3_Nov.2012.zip
cd kpp-2.2.3
|
Line one will go to your home directory, and line two will automatically download
the software there, while line three will unpack it. This will create a new
directory with all the contents of the .zip file, so the last command line
will move to the recently-created directory, which is now the KPP directory.
Note
This last set of commands can be run from any directory because we first moved to the home directory (in the first line) before downloading and unpacking everything. This was done just to make things easier and more compact, but KPP can be downloaded and run from anywhere in your system, so if for some reason you want to download, unpack and install it somewhere else, feel free to change the first line accordingly.
Make sure you’re in the correct directory by entering pwd, which should show
you the full path to the kpp-2.2.3 directory. You can also type ls, which should
show you a list of everything that was in the zip file:
cflags        drv       int                 Makefile.defs  site-lisp
cflags.guess  examples  int.modified_WCOPY  models         src
doc           gpl       Makefile            readme         util
Making sure dependecies are installed
Now we are going to set-up the environment to compile KPP. The first step is to make sure that you have the necessary software. These are called the dependencies of a program: it is everything the program needs to be available in the system (softwares, libraries, etc.) before it’s installed.
Be sure that FLEX (which is a public domain lexical analizer) is installed on your
machine. You can run flex --version and if it is installed you should see
something like flex 2.6.0. If instead you see something like flex:
command not found then it means that it is not installed and you’re going to
have to install it by running sudo apt update && sudo apt install flex if
you’re running Linux natively (depending on your Linux distribution) or by
manually downloading and installing the file if you’re emulating (with Cygwin,
for example). A quick google search should tell you how to install it easily.
Note: if flex isn’t available for you, you might need to install the
Flex-dev package with sudo apt install flex-devel.x86_64 or something
similar.
Be also sure that yacc and sed are installed by typing which yacc
and which sed. If you see something like /usr/bin/sed or
/usr/lib/yacc then they are installed. If you see an error message, then
you’re also going to have to install it manually. Again, a quick google search
should tell you how to do it, although it is very rare that these packages
aren’t installed.
Note
flex and yacc have to do with lexical analysis and it’s not specially
important to know exactly what they do. Suffices to say that they are used
internally by the compiler to generate the executable file, but you will never
have to use them directly when compiling/using KPP. On the other hand,
sed, is a very useful text manipulation tool that you might benefit from learning, but
you also won’t need to use it while running KPP, so feel free to disregard it for now.
Telling your system where KPP is
Now that we have the dependencies installed, we need to make sure that your
computer knows where KPP is in your system. We do that by altering a file
called .bashrc. This file is a simple text file (so can you easily open and
read it, as you’ll see) with some very simple commands. Every time you start a
terminal that file is “read” internally by the terminal and executed. So inside
that file you can put any command that you could type in the terminal. Thus,
generally, if you want to change something in your terminal so that the change
takes place every time you start it (so you don’t have to re-set that change
over and over again every time), that’s the place to do it. For our purposes we
simply need to add a couple of lines. We’ll do that step by step.
Note
If you’re using a terminal other than Bash the .bashrc file will probably
have a slightly different name (like .cshrc e.g.) and the commands might
also differ a bit, but the process and the ideas are the same! You’ll just have
to probably do some quick googling.
Now you need to open and edit .bashrc from the terminal which can be done
with many programs, it really depends on what is installed for you (or what you
would like to install). The best options would be an editor that runs with a
GUI. For Windows users the best option is probably notepad++, while for
Linux users gedit is generally the default GUI option. You can try these
(and any other GUI plain text editors you know) with the commands gedit
~/.bashrc, or notepad++ ~/.bashrc and so forth with the others.
If any of those work, great!, you can edit the file in an intuitive GUI editor.
If not, you’re either going to have to find yourself a text editor with a GUI,
or use Nano by running the command nano ~/.bashrc. Nano is a very handy
text editor which runs on the terminal itself, however, it’s not as
eye-pleasing and not as intuitive as the GUI-based ones.
Note
If you’re forced to use Nano, you should probably read this very quick tutorial to learn how to open, save and close files. It’s not as intuitive, but it’s very easy.
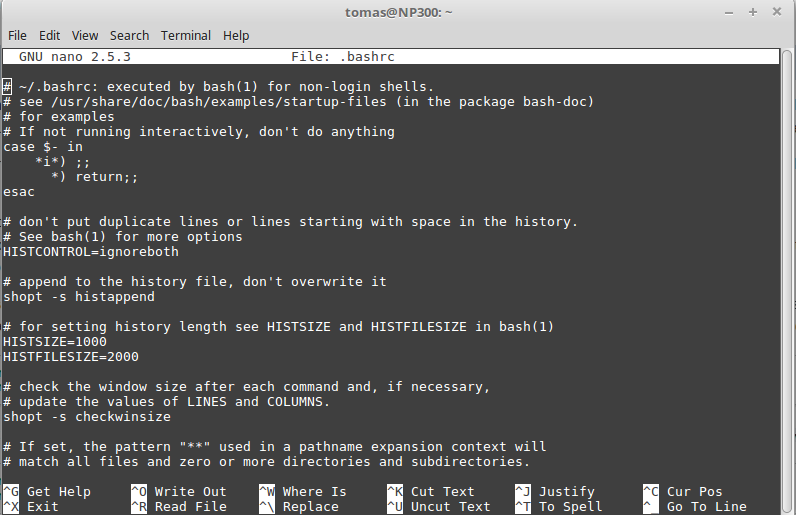
.bashrc example.
Once you open .bashrc, you’re going to see something like Fig.
.bashrc example. (in this case open with Nano). Don’t worry about the lines of
code. They’re probably going to be different for you and that’s OK; it really
varies a lot from system to system. You can ignore all those codes and jump to
the last line of the file. After the last line you’ll include the following
export KPP_HOME=$HOME/kpp-2.2.3
export PATH=$PATH:$KPP_HOME/bin
That will work if you followed exactly the previous commands and installed KPP
in the home directory. If you didn’t you should replace $HOME/kpp-2.2.3
with the output of your pwd command which you just saved.
After this is done, you are going to save and exit. If you’re using any option with a GUI this should be straightforward. With Nano you can save and exit by pressing control X, choosing the “yes” option (by hitting the “y” key) when it asks you to save, and then pressing enter when asked to confirm to name of the file to save to.
Now your terminal will know where KPP is the next times you start it. But for
the changes to make effect you need to close this terminal and open another
one. So just close the terminal you were working with, open a new one. Now, if
everything worked properly, you should be able to type cd $KPP_HOME and go
automatically to your KPP directory. If this worked, we are ready for the next
step, which is telling your system how to compile KPP.
Specifying how to compile
Now we actually compile (which is a way of installing) KPP. First, type
locate libfl.a and save the output. If there is no output, use locate
libfl.sh and save the output of that. These commands tell you where the Flex
library is, which we assured was installed somewhere in the system during the
last section. In my case the output was /usr/lib/x86_64-linux-gnu/libfl.a.
Now in your KPP directory, use the same text editor as before to open a file
called Makefile.defs, which sets how Bash is going to make the executable
code for KPP (i.e., it only gives instructions to your computer on how to
compile it). So type gedit Makefile.defs, or nano Makefile.defs and so
on, depending on the editor you’re using.
Once again, you’ll see a lot of lines with comments, and the only lines that
matter are those that don’t start with #. There should be 5 lines like this
in this file. The first one starts with CC, which sets the C Compiler. In
this guide we will use the Gnu Compiler Collection, gcc. So make sure that
the line which starts with CC reads CC=gcc.
Note
If you prefer to use another compiler, put that one there instead of gcc.
Next, since we made sure that Flex was installed, make sure the next important
line reads FLEX=flex. On the third step, set the next variable
(FLEX_LIB_DIR) with the output we just saved without the last part. So in
my case the output saved was /usr/lib/x86_64-linux-gnu/libfl.a, so the line
will read FLEX_LIB_DIR=/usr/lib/x86_64-linux-gnu. You should, of course,
replace your line accordingly.
The next two items define some possible extra options for the compilation and extra directories also to include in the compilation. We don’t have to worry about those, unless maybe if we need to debug the program for some reason. Now you can save and close/exit the file.
If we did everything correctly we can compile KPP simply by running:
make
on the terminal. Many warnings are going to appear on the screen (that’s
normal), but as long as no error appears, the compilation will be successful.
You can be sure it was successful by once again running ls and seeing that
there is now one extra entry on the KPP directory called bin:
bin           doc       gpl                 Makefile       readme     util
cflags        drv       int                 Makefile.defs  site-lisp
cflags.guess  examples  int.modified_WCOPY  models         src
Now let’s test it by running the following command:
kpp test
If the output after this command is something like
This is KPP-2.2.3.

KPP is parsing the equation file.
Fatal error : test: File not found
Program aborted
then we know it worked. This tells you the version of KPP and that it couldn’t find any file to work with, which is fine because we didn’t give it any yet. If this works, you can skip to the next section.
If, however you get an output similar to kpp: command not found... then
chances are that bin is a binary executable file, while it should be a
directory containing the binary file. This should not happen, according to the
manual, but for some reason it (very) often does. We need simply to rename that
executable file and put it a directory called bin. This can be done with
the following command:
mv bin kpp && mkdir bin && mv kpp bin
Try this command and then try kpp test again. You should get the correct
output this time, meaning that the system could find KPP successfully.